0

Which Vic Specification is best for Rubber Lining?

25.03A and 25.03C

25.03A and 25.03C

The Basics

When you manufacture a rubber lined pipe and create your own groove there is basically 2 types of grooves specification you can choose. Victaulic Spec 25.03 which has two sub categories.

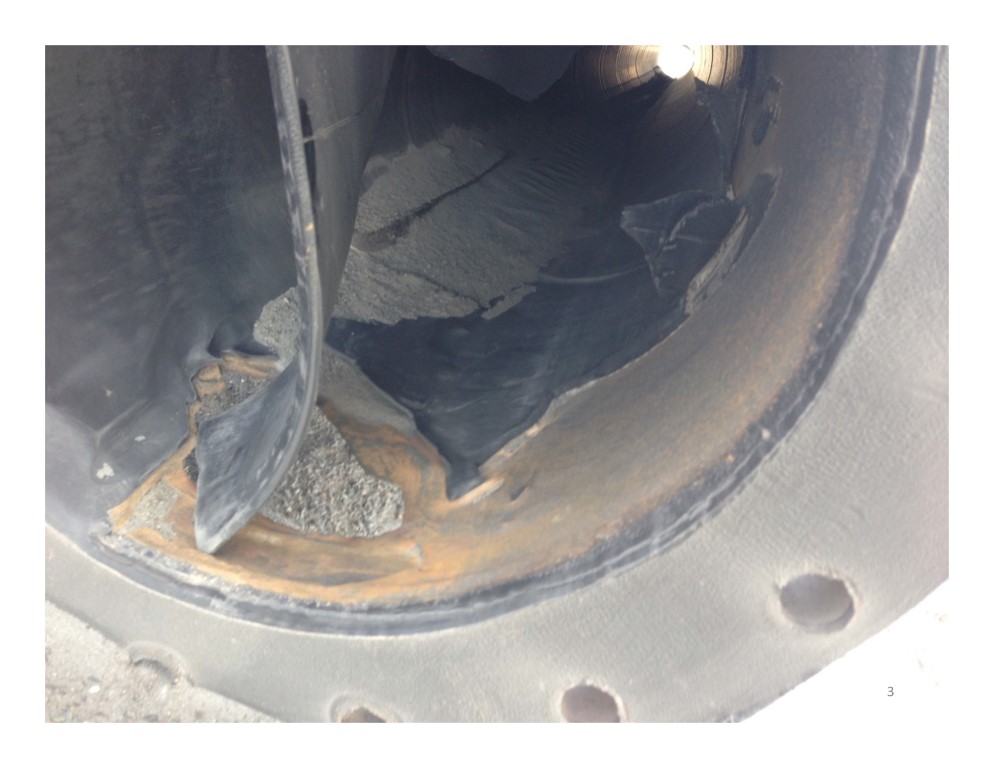
25.03A The A stands for cut groove for abrasion only. If you refer to the diagram above you will see that the Victaulic coupling system has  gaps when assembled and they vary based on diameter and coupling styles. A list of the gap sizes are listed below. The gaps are there to accommodate a certain amount of pipe line flex approx 1 deg depending on size. The more important fact is in a slurry application the gap exist and will fill with the slurry. In a slurry application with no corrosive material this is not a problem and will pack with fines. But is corrosive application such as Phosphates or Acid the steel in the gasket area is exposed and will deteriorate before the liner will. 25.03A is good for abrasion service but not corrosive service.

COMMON VICTAULIC END TO END COUPLING GAPS
PIPE SIZE (NPS) CLAMP STYLE END TO END GAP inches   (mm)
2 ½ – 3  Style 07, Zero-Flex Rigid Coupling 0.067     (1.7)
4 – 6  Style 07, Zero-Flex Rigid Coupling 0.161     (4.1)
8  Style 07, Zero-Flex Rigid Coupling 0.189     (4.8)
10 – 12  Style 07, Zero-Flex Rigid Coupling 0.130     (3.3)
2 ½ – 3 ½  Style 77, Standard Flexible Coupling 0.063     (1.6)
4 – 12  Style 77, Standard Flexible Coupling 0.189     (4.8)
14 – 24  Style 77, Standard Flexible Coupling 0.189     (4.8)
26 – 44  Style 44,  Ring Coupling with “D” Type Adapter 0.500     (12.7)

25.03C  The C in this specification means cut groove for corrosion application. In other words if you have any transport material which has corrosive materials, this is the spec you require as rubber is returned into the groove or below the gaskert this can be seen in the diagram at the top. The exposed steel will be covered by a layer of rubber eliminating the opportunity for corrosion in this area. Only use for corrosive service as the additional cut in the steel ads costs to the pipe.

More Advanced 25.03?

25.03 is a good spec but was designed to accommodate a problem in the Vic system when used with rubber lining. When rubber lining a cast Vitc fitting, the recommendation is that you utilizes the specification VS-222 which we will call for this example 25.01B. “B” standing for Bad. This specification states that you add 1/8″ of rubber to the face of the fitting. That this does impede on the gap required in a Vic coupling system. So 25.03 is designed to add more space to the coupling groove, in the instance that a rubber lined cast fitting mates up to a pipe. The additional space is then maintained and the original gap is perfect. The challenge comes when you mate a cast fitting to a cast fitting 25.01B – 25.01B. This adds 1/8″ of rubber per gasket face and on a fitting that is 3″ in Dia. with a  gap of  1/16″ and you put 1/4″ of rubber, it doesn’t work.

If this sounds complicated, we’ll, it is. Below is a diagram explaining what happens to the gap in different situations. There is a spec below which is called 25.01A which we will discuss after this diagram but it maintains the designed gap regardless of cast fittings or pipe assembly.

Vic Groove and RUbber_001

Advanced

The correct groove to use is 25.01A and 25.01C. These are the dimensions of 25.01 but with 1/8″removed on the face to be replaced with rubber. So the final finished dimension will be the same as 25.01 in all situations. The down side to this is that all cast fittings needed to be rubber lined will be required to be machined back 1/8″ for the addition of the rubber face gasket. No matter what you do this is the correct way to maintain the designed gap in cast fittings as well as the pipe.

1

Rubber liner failure diagnosis and probable causes. Part 1

Pipe -01_003

Figuring out just what went wrong after the fact is difficult but some of the circumstances of the failure can indicate the modes of failure.

Below I will list the problem and then identify what can go wrong in the lining procedure, manufacturing of rubber, improper match of material to process and mechanical failure that may have created this situation.


Delamination at the edge and or seam only: This occurrence can happen for a few different reasons.

Sharp Internal Edges :The most common reason is improper steel prep, meaning the welded flange had a sharp internal corner. Due to the rubber elasticity it’s difficult to properly adhere to an inside sharp corner.  During the cure the rubber may pull itself out of the corner depending on the rubber type. This results in a potential air pocket which can cause failures in the cure and is susceptible to erosion or edge separation depending on the compound.

Chlorobutyls and Bromobutyls and slurry chemicals: An interesting fact about rubber sheet with butyls is that on often rubber sheet manufacturers will us what is called a tie gum rubber to promote adhesion as a small layer. Depending on the application the tie gum which is a pure natural rubber may not be able to handle the high heat or the chemicals butyls are renown for. Separation at the seam is common if closed skives aren’t used or if the temperature exceeds the natural rubber threshold


Pipe-03_4CLateral

Edge delamination due to tie gum backing.


Sheet or sections fall off or are peeling off with little effort:

Improper Sandblast or dirty surfaceA blast profile of Nace standard SSPC SP5 is required with a profile of 2-3 1/2mils for raw rubber and a profile of 4 mils for pre-cured rubber . The reality is that the adhesive systems used in rubber lining are very aggressive and the blast profile can range and still be successful. None the less if you do not use proper girt to blast. Accidentally blasted with glass bead you can have failures.

Problematic adhesive: If you don’t stir the adhesive well, you will be applying more solvent than adhesive. If you  get dust on the adhesive you will prevent proper adhesion between coats or sheet. This will likely cause failures in the cure but if it makes out is prone to delamination in the field.


IMG00174-20120716-1123

Example of improper adhesive causing the sheet to delaminate.


Rubber edges growing like mushrooms, or failures near the edges:

UV and Ozone: UV and ground level ozone are rubbers enemy. Liners exposed for a period of time to the sun are prone to failure. Most rubber loose their elasticity and ability to combat erosion and corrosion. The outer edge is susceptible as it  most likely to be exposed to the sun. Although flange connections exposure have no performance effect as the inside of the rubber is not being exposed. Spools stored on the ground are likely to have exposure problems. Most rubber likes dark spaces and generally wont be affected by light in the short term like a few weeks. As a rule of thumb keep all rubber capped or cover.


IMG_1177

UV exposed rubber.

Pipe-02_003

Edge failure de to exposed rubber to UV.


Bubbles and dark spots in the rubber: 

Bubbles can form for various reasons. They will be discovered during the curing process. If not inspected and repaired before going into service will be a cause for concern long term. The rubber will be susceptible to tear and will wear as it will create turbulence.

Rubber calenderer with bubbles: This is very common as the rubber is layered up, air can be trapped between layers. The result is unsightly bubbles in the sub-straight. If the bubble are not very pronounced it will not affect performance. A visual inspection and a spark test can determine the severity of the bubbles.

Bad stitching and trapped gasses: If the rubber is improperly stitched or there is problem with the off gassing of the adhesive you will find out in the cure. Bubbles will be the result.

IMG00727-20130225-1346

An example of bubbles calendared into a sheet.

IMG-20131127-00375

An example of bad stitching, diluted adhesive or poorly applied adhesive, trapped gasses or dirt on the sub straight or liner.

IMG00551-20130108-1147

This is an example of rubber that has impurities in the compound which reacted to the cure.

IMG_0829

Example of sheet that has been calendared with trapped air. This is a bad liner and can cause turbulence, this would not pass a spark test and would perform poorly. This liner cannot be used!


Pre-Mature Erosion of the liner:

The factors which cause a liner to wear quickly  are vast. More often than not the velocities and particle sizes have exceeded the limits of rubber sheet. Chemicals not conducive to the rubber liner may be present and may have affected the liner such as pine oil a hydrocarbon which is not friendly to rubber.

100_0654

This piece eroded in less than a week. Velocities were extremely high and the particle size was 3/4″ minus. Very large. A better application would have been ceramics or chromium carbide.

 To be continued….


0

What are the maximum lengths for rubber lined pipe?

754595.7998rc

The length of pipe that can be lined often comes down to the transportation method.

When rubber lining pipe, there is a maximum length that can be practically lined.

Here are some of the general rules of thumb when it comes to lining lengths. These rules however are not set in stone. In fact longer lengths can be achieved but the failure rate of the liner installation and cure go up significantly if the lengths listed are not respected.

1 – 2 1/2″ in Dia.  The realistic length to line a pipe is 24″ long. This is primarily due to pulling the liner in wet in the adhesive filled pipe. Generally in this size you will need to install the tube wet without the use of a silk as there is no room. Toluene is applied to the outside of the tube liberally in order to have the tube slip into place. This is the most practical method of installing the tube. As you drag the tube through the first few inches of adhesive  dissolved and get displaced. Any longer and the adhesive would be removed completely. This would result in a failure during the curing process.

3 – 4″ in Dia. In this size 10′ sections are recommended. This is due to tight constraint of the pipe. The tube is rolled into a silk but managing it to spring into place without a wrinkle is very difficult in this size. This diameter is also prone to trapping air. The smaller length allows the rubber liner to work the air bubble. Any longer and the trapped air would be too difficult to work out.

4 1/2″ – 14″ in Dia. This allows you to line length up to 20′ with no concerns.

16″-60″ in Dia. The length of pipe that can be lined often comes down to the transportation method.

Transport Truck -The longest common length you can transport if 40″ on a truck flat-deck. Loads can be longer baser on trailer design.

Shipping container 39′ is preferred as the inside length of a container is 39,5″ for ease of packaging an open top container is recommended.

Rail- offers you an interesting option as lengths can be as long as 50′-80′ assuming you have the material handling equipment supplier of material that length, autoclave to cure the material or manifold and boiler that can provide enough steam for an atmospheric cure and rail spur to accommodate these lengths.

0

HDPE and RubberLined Pipe

Image_001


Can you mix and match HDPE and Rubber lined pipe?

The short answer is yes!

Why would you want to mix the two?

There are several different reasons to mix HDPE and carbon steel. The majority of the time you have an HDPE line that needs custom fittings that are not able to be built in HDPE due to pressure constraints. You make them out of carbon steel. Long sweeping radius are better accomplished in carbon steel induction pulled bends.

What about misalignment?

Using reducing flanges on the carbon steel combined with different liner thicknesses you can match up the ID on many schedules of HDPE piping. se picture above!

What about grooved terminations?

Using Style 997 couplings and D-rings on carbon steel you can achieve matching ID’s.

Where has this been used in mining?

Some of the best examples of this i have seen is on tailing manifolds. HDPE being used for the run to the taillings pond but the Tee shapes being made of carbon rubber lined, for strengths and configuration. Also many 3D elbows and laterals made this way to change the direction using carbon steel. Many more shapes are available in steel as opposed to fabricated HDPE fittings which can be weaker than the extruded pipe.


0

Why do bubbles occur in rubber?

bubble liner


Bubbles can occur during the lining process. These become most evident after the curing process.

Why do bubbles occur?

There are many reasons this occurs. The most common reasons are the following. Bubbles occur as the air is heated and trapped. The air will expand and will show up after the cure. The  vulcanization process gives the rubber the memory to keep the bubble in it’s final state after cure.

Trapped air in an autoclave is least likely to occur as a pressurized cure is more likely to keep the bubble small and the air from expanding. An atmospheric on the other hand is prone to bubbles. As there is no pressure to keep the bubbles small they are most likely to show up during this type of curing process.

Where does the air get trapped? 

Often when the rubber get’s calendered, depending on the company doing the calendering, the bubble get trapped between the layers. Often if a rubber sheet supplier will realizes this and they will process their rubber sheet in a piercing roll, prickle roll. They will perforate the sheet to let the bubbles out. Often looking at the exterior of the sheet will not tell you if the bubbles are present.

Other places bubbles can form is between the steel, adhesive layers and the rubber layer. If the adhesive was not off gassed properly or there is a stitching issue, dirt in the adhesive, than rubber can not properly adhere to the sub straight. This can cause an area for the air to be trapped and expand.

Poorly welded seams that have trapped air or porosity, porous castings which get rubber lined are all prone to air bubbles. These types of porosity are better addressed before the adhesive process using a liquid metal epoxy to fill potential air pockets.

Can you repair this?

There are a few ways to properly repair these types of lining failures. The picture above is not repairable the liner should be stripped and the pipe relined. It would never pass a spark test or help in reduction of wear in this pipe.

If it is a problem within the rubber itself and fairly small a 10-12 gauge needle can be used with toluene or SC2000 to shrink and adhere the blister. After every repair a spark test must be performed in order to determine if the liner is compromised. For bubbles below the liner a more aggressive repair is required. the bubble must be cut out. The steel sub straight must be ground or blasted in order to give the steel a clean profile and a tooth. At this point there are two patching methods.A cold patch which can be done with an adhesive like SC2000 and a cured piece of rubber,stitched  subsequently buffed flush and again a spark test performed to validate the patch quality. Or a localized hot  patch be used. Uncured rubber with a Chemlok adhesive system, which is then stitched, cured with steam, buffed flush and then verified with a spark test.

2

Slurry and Wear Factors.

100_0654


Why is my elbow wearing out?

There are many factors that affect a liner’s wear characteristics. A liner which is working within it’s operational parameters can last 30 years and that’ the natural beauty of  rubber lining and why it has been utilized in the mining industry for so many years.

 Any of the following will have an affect on the liner life.

Angle of incident: The angle at which the slurry impacts the liner has a large effect on it’s resistance. Rubber is best suited for wet sliding abrasion. Angle of less than 5 deg or greater than 50 Deg have the best lifespan.

Particle Characteristics: Size, Distribution, Profile Characteristics, Hardness, Density of the concentrate and temperature all have an affect on wear.

Type of flow: Is the slurry a laminar flow, turbulent, heterogeneous or a homogeneous mix? What is the flow velocities, these are all factors in liner life.

Pipe Conditions: What is the pipe material or lining material, Durometer? What is the pipe formation, unevenness, bends or slopes? Is the diameter correct for the flow?

Slurry Makeup: Is the material acidic or alkaline. How is the distribution of the particulate? What is the temperature of the slurry?

These are some of the questions and factors which must be considered when choosing a lining material.


11

What is the best curing method?

Steam-Curing-Autoclaveautoclave

There are many acceptable ways to cure rubber compounds. The process of vulcanizing, the cross linking of molecules within a rubber, uses 3 simple variables to achieve this. Changing any one of the three variables will affect how long it will take for the rubber to cure. Time, Temperature and Pressure.

The most common methods are the following:


  1. Steam Autoclave: A large vessel in which you can pressurize with the use of steam, or assisted by a compressor. You must be able to bring the vessel up to temperature in order to cure the rubber. Pro most rubber compounds are designed for steam autoclaves. The pressure reduces bubbles trapped in the rubber compound from expanding. Con you must sandblast the exterior of pipe after the cure due to the rust formed by the steel.
  2. Electric Autoclave: Also a pressure vessel but the pressure is derived using a compressor no steam is added. There are also electric elements as well as fan to circulate the hot air. This type of autoclave reduces the amount of steps required to finish a steel pipe. Pro no need to sandblast the exterior as the steel will not rust in this curing application. Con some rubber compounds manufacturers have chemical packages which require steam in order to vulcanize properly.
  3. Atmospheric Cure: This method of curing is generally the least desirable. But due to object size and shape it is necessary. Usually the pressure is atmospheric so the time to cure is usually extended to 9-12 hours depending on the tarp seal, steam source (HP of boiler) and thickness of rubber. Pro You can cure unusual shapes and large pieces. Con depending on how well the steam is dispersed throughout the cure some section may cure faster than others. Water can pool inside low lying rubber lined area’s. This pooled water can insulate the rubber and leave it uncured.
  4. Chemical Cure: This method is reserved usually for tanks or area’s that are too large to tarp. Some repairs can be done using this method. Special chemical cure compounds are to be used. The challenge with the chemical cure application is that the surface is what get’s affected the most by the curing chemicals. Pro you can cure large area’s that are difficult to tent. You can make repairs and cure the repair only. Con the chemical cure usually only affect a portion of the exterior of the rubber patch or surface leaving the balance of the rubber to cure over time on it’s own. You can get uneven wear.
  5. Microwave cure: Used in automotive or belt manufacturers. Pro can do inline continuous curing Con rubber cannot be attached to steel for this process.


0

What is Rubberlining.org

Rubberlining.org is a web site dedicated to providing information about the world of rubber lining.  We will touch on subjects and factors that affect wear, the best methods for applying rubber, what types of compounds are best for the applications.

Sell_NBR_rubber_sheet