0

How to rubber line pitted and corroded tanks!

IMG_0338

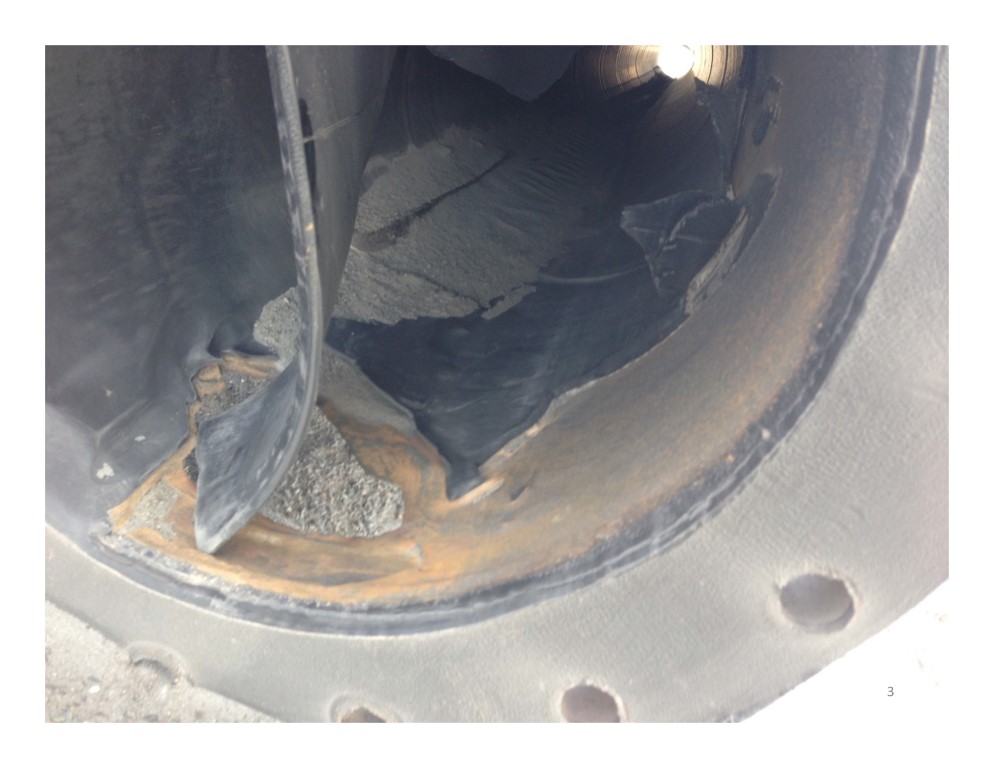
Rubber lining a pitted and or corroded tank can be a challenge at the best of times…

There are many considerations in order to evaluate what materials to use. The most important part of repair, re-line, remediation of a tank is to have a good clean surface.

Blasting the sub-straight to a near white metal is important to remove, dirt, scale, residual chemicals which would all affect adhesion to the sub-straight. After blasting you can also determine the amount of good steel left. Many times repairs will need to be done in the most problematical area’s.

Once the sub-straight has been deemed sound all slag, debris blasting media must be removed and thoroughly cleaned. Suction companies are readily used in order to remove waste materials.  Note when cleaning with solvents ensure the solvents are compatible with the adhesive system being used. For more reference on this see the post on Toluene and Trichloroehtylene.

Also note that dehumidifiers, heaters and hording of the tank are important in order to control the internal temperatures and climate to avoid flash rusting subsequent to blast.

After the sub-straight is clean you have to decide if you will fill in all the voids. There are several ways and materials you can choose. Bondo has been used, epoxy fillers such as Devcons have been used and ultimately as long as the filler used is stable over time, adheres to the sub-straight and is spread extremely smoothly and you can get a nice final finish, than you can use it to fill in the voids. The reason you need to fill the voids is if you use pre-cured sheet rubber for your application than the amount of surface the backing will be in contact with can be as little as 30%. By filling in the voids you can have 90-100% of the backing surface being properly adhered.

The next part of this equation is what method of lining and curing to choose.

1- The best possible liner you can put into a tank is a raw rubber liner that gets vulcanized after installation.

Pro’s

-Raw un-cured rubber has good malleability in order to get into all the scaling crevasses.

-You will get the best adhesion using uncured rubber.

-Ultimately an installed and cured liner will have more homogeneous seems.

Cons’s

-Small tanks are the only practical sizes for this type of rubber application

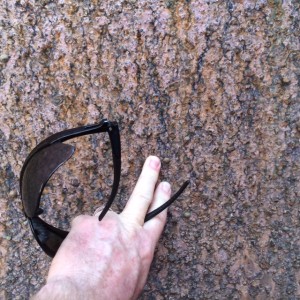
-Rubber cures in sun and in UV, depending on site conditions and storage, the  top layers may cure while waiting to be installed, you may lose rubber square footage depending on your application time and conditions.

-Any pits not filled with an epoxy can be prone to blistering as the air trapped in hole will expand during the cure and may set that way.

-The limitation of course of this type of lining style is the availability size of your boiler. ex.   60′ X 65′ Dia. high tank would require a 300 HP boiler to overcome the heat loss of a hoarded tank. The boiler would consuming approx a swimming pools worth of diesel in order to provide a 24 H cure.


2- The most common method of handling tanks is using cured rubber.

Pro’s

-The rubber can not go bad on site.

-You save all the curing time, diesel costs, hording, setup for the cure.

Cons’s

-You must buff the backing or have the backing pre-buffed for good adhesion to the sub-straight.

-Adhesion to the sub-straight is more difficult as the rubber is rigid. Extra time needed for good stitching to ensure proper adhesion.


3- The least desirable are the chemical cure liners.

Pro’s

-You get to use semi-uncured material which is generally easier to line with.

-You will get better adhesion to the surface.

Cons’s

-After the initial chemical kick for curing the liner takes approx 18 days for a full cure. People are generally in a rush to add the liquid back into the tank. Filling the tank prior to the full cure will halt the cure and you may not get durometer or the intended performance out of the rubber required.


4- Using uncured rubber and curing the rubber using hot water.

Pro’s

-Raw un-cured rubber has good malleability in order to get into all the scaling crevasse.

-You will get the best adhesion using uncured rubber.

-The rubber will cure very consistently.

Cons’s

-Difficult to get that large of a volume of water.

-Heating that much water requires alot of energy, and that can get very expensive.


As you may have noticed we did not go over any of the nuances of lining on site. We focused primarily on the types of method applications and none of the health and safety, site requirements unique to every site.

In the end lining a corroded tank is not for the faint at heart. It requires years of field experience in order to perform these jobs on time and on budget.


4

Inspection of Rubber Lined Vessels

lined 3

An inspection of a rubber lined vessel should be conducted once per year and never delayed. A close check should be maintained on operating procedures and conditions at all times. If a problem is going to occur with a rubber lining, generally it will happen within the first 3 months of service, which is why it is important to check a lined vessel after the first 3 months of service.
This is likely to be true whether the problem is caused by workmanship or by misapplication of material choice.
In some cases, the solution for which the tanks were originally lined for will have little detrimental effects on the rubber while the increase of a few percentage points in the service condition (added heat, less of more concentration, introduction of new chemical) may have a definite deteriorating effect of the rubber.
The tank must be clean, degassed, and dried before a proper inspection can be made.

A full visual inspection should be conducted, being aware of:
– Any loose seams
– Blisters
– Cracks
– Cuts
– De-lamination of the sheet surface
– Discoloration or suspicious areas

Notes of the date of the inspection should be entered within a log book which is kept on each rubber lined tank and should be updated each time the tank is inspected. The areas which were described as suspicious on the previous should be identified by some means of a reference of a location and rechecked with each additional inspection.
***Note: On entering a rubber lined tank, workmen MUST wear smooth sole shoes (no contamination is acceptable) and be very cautious not to drop sharp or heavy tools onto the lining or place hot electrical lights against the rubber linings. Ladders MUST have padded feet (both top and bottom) and placed gently inside the tank.

Any questions on inspections of rubber lined vessels or repair procedures please consult

Rubebrsource


Buck Meadows / Rubber Technologist

RubberSource at 519-620-4440.

0

Victaulic XL Fittings vs Additional Rubber on Elbow Extrados

XL

Victaulic XL Fittings vs Additional Rubber on Elbow Extrados

Victaulic has come up with an interesting way to increase the longevity of fittings for mining and wear applications. For those of you who haven’t hear yet, the concept is to produce a larger ID fitting in order to add more rubber in the critical fittings, enabling your fittings to last longer. These fittings will than mate up to your standard sized ID, OD pipe.  Using a stepped XL coupling it bolts up to your existing pipe with the same ease of all 07 and 77 couplings. The ID of the thicker lined fittings matches up perfectly to your thinner lined pipe.

The majority of wear occurs in changes in direction. Elbows are particularly vulnerable to wear do to this fact. By increasing the rubber in the fittings from 1/4″ thick rubber to 1/2″ rubber you get two benefits. You get a thicker wear sub-straight and a better cushion for the forces on the liner. The result is a significant increase in lifespan from these fittings.

The down side to these fittings is that you can no longer use the standard 77 or 07 couplings in your system. You will need to get the stepped XL couplings. Since these fittings are unique to rubber lined systems the availability and lead time on these components can be a challenge.

Traditionally the way to increase the life in your elbows is to add an additional layer of 1/4″ rubber on the extrados of the elbow. This created the 1/2″ of rubber desired. This allows users to keep their existing couplings and adds longenvity to the elbows..

The downside to this type of additional wear material is the transitions are not always made the same. Depending on the rubber liner installer, you can get  various transitions in the rubber, some better than others. If a bad transition is made in the rubber, you can get an undesired turbulent effect. This will result in eddy currents in the elbows and fittings and this effect will prematurely wear out the liner.

Victaulic has created a good system which addresses the additional material required in high wear situations. It is an effective way to increase the life span of your fittings. The ID’s of the fittings and pipe having no transitions which ensures no unintended premature wear.


2

What elastomeric lining material is appropriate for what service?

Rubber Types


Rubber selection can be intimidating as there are a number of engineered high performance linings which can have several different applications. I will list a few different elastomers and durometers as a general guideline.

There can be many different formulations of the compounds listed below with different physical properties than what is listed.


Soft Natural Rubber, 30-60 Duro Shore A, Temp Limit 160 Deg F, Resistance to Hydrocarbons Poor

Typical Uses: Acid Storage depending on concentration, Transportation equipment, Abrasive Services, Sulphur dioxide scrubbers.

Semi Hard Natural Rubber, 80-85 Duro Shore A,  Temp Limit 180 Deg F, Resistance to Hydrocarbons-Fair

Typical Uses: Chemical Processing and Plating

Hard Natural Rubber, 90-100 Duro Shore A, Temp Limit 200 Deg F, Resistance to Hydrocarbons-Fair

Typical Uses: Chemical Processing, High temperature nickel-copper plating, steel pickling, vacuum service.

Graphite Loaded Hard Rubber, 90-100 Duro Shore A, Temp Limit 212 Deg F, Resistance to Hydrocarbons-Fair

Typical Uses: Special lining for wet chlorine gas, in chlorine cells and associated equipment. High wear applications.

Three-ply (Soft, Hard, Soft) 40-50 Duro Shore A, Temp Limit 230 Deg F, Resistance to Hydrocarbons-Fair

Typical Uses:Steel pickling lines, Phosphoric Acid

Neoprene 40-70 Duro Shore A, Temp Limit 230 Deg F, Resistance to Hydrocarbons-Very Good

Typical Uses: Chemical or abrasive services with oil present, best for strong bases, good weather resistance, fire retardant.

Nitrile, 60-90 Duro Shore A, Temp Limits 200 Deg F, Resistance to Hydrocarbons-Excellent

Typical Uses: Aliphatic hydrocarbons, kerosene, animal, vegetable and mineral oils.

Butyl, 50-75 Duro Shore A, Temp Limits 225 Deg F, Resistance to Hydrocarbons-Fair

Typical Uses: Oxidizing acids, 70 percent hydrofluoric acids, super phosphoric acid, best water resistance, good for alternative service.

Chlorobutyl, 40-60 Duro Shore A, Temp Limits 200 Deg F, Resistance to Hydrocarbons-Fair

Typical Uses: Much the same as butyl but easier to apply and faster curing, sulfur dioxide scrubbers.

EPDM, 40-60 Duro Shore A, Temp Limits 180 Deg F, Resistance to Hydrocarbons-Poor

Typical Uses: Hypochlorite bleach, ozone and weather resistant.


Feel free to ask about applications and we can suggest compounds.


0

Soluble Salts Testing

Soluble_Salt_Meter_Working-resized-e1367233453953-237x220

Soluble Salt testing is becoming the latest inclusion into EPCM specifications for quality requirements.

What are Soluble Salts and Sulphates?

Soluble Salts and Sulphates are the most dangerous forms of contaminants for paints and coatings. When they are painted over they have the power to draw moisture through Osmosis and cause blistering, detachment and accelerate corrosion of the underlying metal. When steel is repainted, rough or pitted areas are visible after dry abrasive blast cleaning. These may contain soluble salt contamination, especially in the base of the pits. Dry abrasive blasting does not remove these salts. It is wise to check for the presence of soluble salts with specially designed field test kits before painting and if they are present in detrimental amounts, to take additional cleaning steps to remove the salts.


How can you test for Soluble Salts?

The common tools used to test for soluable salts are the Chloride Iron Test Kit for Surfaces. This test looks for remaining chloride levels on a sub-straight prior to painting. The second tool is a Salt contamination Meter. This tests for soluble salts on the substrate surface prior to painting by absorbing distilled water soaked filter paper and then testing it.


How do Soluble Salts Occur?

There are many ways your steel can be exposed to soluble salts and sulphates. The most common way is through transportation. Pipe and steel travelling at sea can accumulate contaminants during travel to the fabricators. The other method is when trucking materials during the winter. Road salts can easily be distributed on to steel during the transportation process.


Is checking for Soluble salts necessary?

Soluble salts became an additional test required and recommended by Nace.  As engineers attempt to cover off as many concerns with their specifications as possible, it is becoming a popular addition. The method of testing and the frequency required by this code make production volume of pipe spooling and steel testing costly and difficult. Most pipe from mill come with mill varnish helping protect the surface during travel. New steel will generally not be pitted, where a good sandblast profile will easily eliminate any surface contaminants. There are situations where you are on an oil platform, recoating old steel, in the middle of the ocean where this specification is highly advisable but for most steel processing this is considered over processing. The short answer is where required.


Soluble Salt in relation to rubber lining.

Generally speaking in a rubber lining application, the internal liner will fail far sooner than the steel or coating will deteriorate. Rubber lined product is generally considered a wear product. Warranties are difficult as process flow, materials configurations are always changing. Unless adamantly specified this specification should be avoided.


0

How to compare rubber compounds for slurry applications.

evaluation

Rubber specifications are confusing and some of the properties described in some specification sheet do not help evaluate the wear characteristics of the compound.

In fact most of the time the important lab tests, which tell you how well a rubber will perform in a slurry application are left out.

Specification sheets contain many characteristics which are elemental by definition. In other words the fact that the rubber is tan in color has no relevance to the actual wear “the undesirable mechanical removal of material in fine particle from from the surface.”

Here are some of the common specification criteria and their relevance.

Durometer: (Elemental Property)

In a slurry wear application the fact that a rubber is softter than another may indicate that it may be perfom better or worst but that would be opinion. Harder compounds generally perform better under cut and chip situations but there is a lab test for cut and chip as well as wet sliding abrasion. Durometer is not really the deciding factor. This rubber just happens to be a given duro shore A.

Tensile Strength: (Elemental Property)

Tensile strength is very useful when comparing rubberized tracks and track pads for tanks. As the ability not to rip apart is important. When comparing an elastomeric lining which is adhered to a steel sub-straight it’s tensile strengthen is not relevant factor in this application.

Ultimate Elongation: (Elemental Property)

Going back to my previous example when a snowmobile takes off  the ultimate elongation is very important so that engineers and designers can calculate if this track will perform correctly. In a rubber lined wear application this factor is not relevant. It will never achieve it’s ultimate elongation adhered to a metal sub-straight.

Specific Gravity: (Elemental Property)

This is the actual density of the product. In the olden days the buoyancy of rubber was a good indicator of how many rubber fillers were in the product. Floating rubber was regarded as good rubber. Dense rubber was thought to have more clay which would adversely affected it’s wear performance. This day and age with material sciences helping to improve material quality, adders like carbon is common. Carbon increases wear characteristics in some cases. Therefore the specific gravity is simply that, what it’s density is. Not a good wear performance indicator.


Performance properties are “Real factors which can be tested and directly speak to the wear performance in a slurry application.”


Cut and Chip: (Wear Performance Property)

Cut and chip is a test performed in a lab where you can accurately compare compounds and find which is the best in a cut and chip application. This is completely relevant when you are trying to increase the longevity of a liner in a slurry application. This was a test devised by BF Goodrich in order to evaluate how good the tires would perform on the road. A very good indicator of wear life.

Wet Abrasion: (Wear Performance Property)

A test to determine the exact resistance in wet abrasion. It’s a sliding plate that cycles on the rubber in a container of a known wear slurry and the removal of the material is then measured to determine is wear performance characteristics. This is very relevant to wet sliding abrasion test to determine the rubber wear.

Water Resistance: (Wear Performance Property)

Also known as the percentage of swell. The reason this is important is the amount of swell will adversely affect wear within certain services such as acid. The more a rubber will swell the less it will perform in that situation.

Resilience:(Wear Performance Property)

The ability to return to it’s original shape is a huge factor in determining if this rubber will be suitable for wear. The more resilient the better the rubber will perform in a slurry application.

Tear (Die C):(Wear Performance Property)

This is another important performance criteria as the ability for the rubber to hang on to the straightaway is important. This is a relevant value when considering rubber for slurry wear applications.

Conclusion

Rubbers with high Cut an Chip resistance and Wet Abrasion resistance will perform better in wet slurry application. Elemental properties such as density are interesting and mater of fact but should not be deciding factors when choosing rubber compounds for wear applications.


0

Flange Bolting Specification For Rubber Lined Pipe

flanged-torque-sequence

Suggested Methods and Guidelines for Torquing and Bolting Flange Joints

 1) Bring mating flanges into contact and install bolts, Torquing nuts “finger tight”.

2) Align pipe and adjust bolts to produce a uniform gap between the flange faces.

3) Torque two opposing bolts to 1/2 the full torque suggested for the pipe size being

4) Repeat step 3 for the bolts nearest 90° to the first bolts torqued.

5) Continue Torquing opposite pairs of bolts until all bolts have been tightened.

6) Repeat steps 3 through 5 until all opposite pairs have been torqued to the full value

suggested for the pipe installed.

Pipe Size (Inches)         Bolt Size         Bolts    Half Torque (Ft-Lbs)   Full Torque (Ft – Lbs)

2                                  5/8                   4                                  6                                  12

3                                  5/8                   4                                  8                                  16

4                                  5/8                   8                                  6                                  12

6                                  3/4                   8                                  9                                  18

8                                  3/4                   8                                  12                                24

10                                7/8                   12                                13                                26

12                                7/8                   12                                18                                36

14                                1                      12                                25                                50

16                                1                      16                                23                                46

18                                1 1/8                16                                25                                50

20                                1 1/8                20                                23                                46

24                                1 1/4                20                                34                                68

30                                1 1/4                28                                32                                64

36                                1 1/2                32                                44                                88

42                                1 1/2                36                                50                                100

48                                1 1/2                44                                49                                98

60                                1 3/4                52                                69                                138


Practical Method Used to Prevent Over Torquing Gasket and/or Face Lining Rubber

A.Mechanical steel ring stop or non-compressible gasket properly chosen to limit

compression to 25% on the rubber lined flange joint.

• When soft rubber lined flange face is used as gasket, the rubber lining

should be brought up to 1/32″ of bolt hole.


  1. The use of a full-face, fully cured gasket, somewhat softer than the rubber on the

flange face. This gasket takes the bulk of the compressive distortion, minimizing

problems to the flange lining. This method is mandatory when hard rubber is used

in lining pipe.


Over-Compression of Rubber Lining on Flange Surface

 • Rubber in compression by over-stressing it beyond the elastic limits will

• A mechanic in an attempt to obtain leak free performance will excessively

over-tighten the bolts to prevent their loosening.

• Under dynamic loading, the over-compressed rubber fails by tearing and

cracking at outer edges of flange.


Problems That May Invalidate the Use of Specific Torque Numbers

In general, it is not a good idea to specify bolt torque for tightening rubber gaskets

on flanges. Torque can vary over a 2 to 1 ratio. Some reasons are:

• Improper procedures used for torquing bolts.

• Flange may not be true so as to prevent misalignment of one end. Bending

stresses are high when bolting up to pull the flange back in line.

• When flaring out the throat lining over the full face of flange, there may

be excessive stretching and thinning of the rubber. This will not allow

positive or even compression on the rubber when attempting to seal.

• High low spots on flange and condition of bolts.

• Rubber surfaces on flanges are normally coated with various lubricants,

etc. This alone can neutralize all the efforts spent upon specifying torque

• It is better to use a more practical method of using non-compressible

gaskets, etc.


 RUBBER LINED FLANGE ASSEMBLY PROCEDURES

Care shall be taken to ensure that the rubber lined flange is not damaged by being cut or crushed during assembly. The rubber lining on a flange must not compress more than 1/3 of its thickness or the lining could tear away from the metal surface, causing a leak. Listed below are recommendations and procedures for gasketing and bolt tightening rubber-lined pipe, flanges, and equipment.

Use of a gasket is preferred in order to prevent damage to the rubber lined flange face if future removal of the pipe becomes necessary. The gasket thickness should be equal to or slightly less than the rubber lining, but not less than 1/8 inches (3.2 mm) and is also advantageous to protect the original lining on the flange face if the connection is ever dismantled. The gasket hardness should be equal to or slightly less than the hardness of the rubber lining, but not greater than 60 (Shore A). Generally Neoprene, Butyl, or EPDM makes a good gasket material. However, the gasket material should be selected based on the service conditions. The gasket Durometer should be in the 60 Shore A Durometer range. Technically a new gasket should be used after disassembly because the gasket takes a compression set and it is virtually impossible to replace it in the same position. The surface of the lining in contact with the gasket should be treated with a release such as never seize or water base silicone solution, which will allow disassembly without causing damage to the lining.

1) To provide gasket release, we recommend a release agent be sprayed or painted

on the pipe of flange joints. They are various commercial agents on the market.

One we find to function well is Never Seez.

2) Use a star pattern to tighten. All bolts should be initially tightened until they are

3) Then each bolt should be torqued down to 15 ft-lbs. using standard cross pattern

4) Recheck the torque after 4 to 6 hours to ensure that there is a uniform positive

pressure on the assembly.

5) After 24 hours, bolts should be checked to ensure that 15 ft-lbs is maintained.

6) After the line or equipment is put in service, someone should check to ensure that

there are no leaks. If a leak is observed, the bolts should be tightened evenly and

only enough to stop the leak, over tightening the rubber lined flanges will damage the rubber lining inside where the pipe and flange meet and tear the rubber on the flange. All the precautions and directions above must be followed.


RUBBER LINED FLANGES

On flange faces for pipe man ways and/or outlets we recommend the following:

30 to 70 Shore A Durometer Linings

For linings with a Shore A Durometer of 35 to 49 it is recommended to use a full-face fiber gasket. For 50-70 Durometer linings use the lining material itself on the flanges, no additional gasketing is required. For linings of 71 and above it is recommended to use a 60 Durometer EPDM or Neoprene gasket.


Semi-Hard or Hard Rubber Linings

Semi-hard or hard rubber linings have a tie gum and are not recommended for flange faces. It is best to purchase and use semi-hard or hard ebonite lining material without tie gum on flange faces. The hard rubber is non-compressible, and when torqued, it retains its strength. Linings of the hard rubber variety, with tie gum, squeeze out when over torqued, and the hard rubber cracks on the inside radius.


Assembly Recommendation

1.) Assemble using 15-20 foot pounds of torque. Use a star pattern to tighten, and it is

best to recheck the torque after 4 to 6 hours to ensure that there is a uniform positive

pressure on the assembly.

2.) In all cases for pipe assembly a 1/8″ rubber gasket to provide a seal is recommended,

and is also advantageous to protect the original lining on the flange face if the

connection is dismantled. Generally Neoprene, Butyl, or EPDM makes a good gasket material. However, the gasket material should be selected based on the service conditions. The gasket

Durometer should be in the 60 Shore A Durometer range. Technically a new gasket should be used after disassembly because the gasket takes a compression set and it is virtually impossible to replace it in the same position.

3.) To provide gasket release, we recommend a release agent be sprayed or painted on

the pipe of flange joints. They are various commercial agents on the market. One we

find to function well is Never Seez.


Any questions on bolting flanges please contact me RubberSource @ 519-830-0546.

Rubebrsource


Buck Meadows / Rubber Technologist

Technical Sales Manager

RubberSource

0

ASTM specs and what they mean for rubber.

industrial-rubber-33plus_sign232-ASTMlogoB


There are many standards used to qualify rubber. ASTM, NACE as well as others which attempt to define and standardize the industry.

I will attempt to simplify and clarify some of the standards and usefulness.

Some specifications are valid as a key performance indicators for wear, while others are simply elemental, the physical characteristics.

ASTM D297 or Specific gravity is a good example of an elemental specification. The fact that rubber has a specific gravity less than one is a good indicator that it will float. Floating does not necessarily indicate that the rubber will perform better or worse in a slurry application.

In the old days this was used to determine the actual content of natural rubber. Adders and filler like clay and carbon’s can affect the buoyancy of rubber they can also affect it’s wear characteristics most times in a positive way. Material science has gone a long way since the floating test.

Cut and Chip The best indicator for how rubber sheet will perform in a real world application is the  “Cut and Chip” resistance. This test is used to measure the performance of a rubber in a wear application. This test was originally devised by the tire companies to evaluate service life of tires in various conditions. This is a much better indicator of how a compound will perform in a wear application and much less an elemental test, describing the physical properties.

ASTM D2240 or Hardness Shore A although this is a very popular way of describing rubber. Effectively this is another elemental specification. People will argue that the durometer of rubber aid in different wear characteristics and they would be right. But it is still not a final indicator of how it will wear. It simply defines it’s hardness.

ASTM  D412 This one covers Tensile and Elongation this is an interesting specification because elongation and tensile are very good when describing rubber for track. Let’s take a snowmobile track for example. The moment you spin a track, you want the rubber to have enough elongation to absorb some of the initial  inertia. In a rubber lining application it is somewhat irrelevant. When bonding a rubber sheet to steel sub-straight the elongation will never really come into play for wear.

ASTM D624 Tear Die C another elemental indicator. In rubber lining, the force at which the rubber sheet will tear is not good wear resistance indicator. When building a tire, snowmobile or tank track this is a great indicator. Adhered to steel tearing it is the least of your concerns. Ultimately all these factors only help to describe how this material could perform. The forces required for an adhesive pull test is 25lbs to pass ASTM and Nace pull tests are very low compared to most sheet listed tear specifications.

ASTM D7121 Rebound and Resilience Although rarely listed in a rubber sheet or specification, the ability of a rubber to return to it;s original  shape is important especially when defending against rocks, slurry and wear.

ASTM D5963 Wet and Dry Abrasion loss This is a good indicator of if your rubber will last in a wear application. This test directly measures wear. The best wear resistant rubbers will have good wet and dry abrasion properties mixed with excellent cut and chip resistance.

ASTM D573 Heat Aging Depending on the application this is a good test to evaluate rubber longevity. As rubber is generally a cocktail of materials how they perform over time and temperature will vary. This test monitors the physical changes of rubber with aging. This elemental test will give indication of  how the rubber will perform over time.

Rubber wear characteristics are complex and understanding what the specification mean will help you in the long term choice for the various applications.


0

How to choose rubber for slurry applications.

photo_Discharge_CDF_MissionKickOff_010109_sm


There are many factors when choosing the right rubber compound for a slurry application.

The first things to consider is the makeup of the slurry.

Is it Acidic or Alkaline? Some rubbers are better for chemical resistance like Chlorobutyls and Bromobutyls but Natural Rubber is better for Hydrochloric Acid

Are there hydrocarbons present? If so then your best bet is Neoprene.

Is it a high temperature? If so your back to Chlorobutyls and Bromobutyls.

Particle sharpness? When you have very sharp particles you want a higher durometer to resist a cut and chip application. Going from a 40 Duro to a 60 Duro gives the rubber a better chance against sharp particles.

The second thing to consider is the design of the pipe tank or chute you need to line.

What are the velocities? The erosion rate of a the liner is direct relation to the increase of velocity. If the slurry moves to fast and  the material is large like 3/4″ minus. Rubber may not even be the proper lining material. In this circumstance a more epensive liner will perform better such as ceramic or chromium carbide.

Are the bend radius and angles good? The biggest problem you can have on a chute, pipe, bin that is lined is the angle the material is hitting the liner.  If the angle is too acute the liner will wear extremely quickly, there are tricks for this you can have the material hit itself using dead bed techniques. Or you can change the angel for example specify a large radius in a bend.


So what is the best general liner? Wet sliding abrasion in ambient temperature with velocities that are more or less reasonable with no chemicals that can swell or attack the rubber. Line with than 40 duro natural rubber. For any size of pipe 8″ and below 1/4″ is fine anything above you can use 1/2″.


What about thicker liners?

Thicker liners do not mean better performance or longer lasting liners for that matter.  You can pile two inches of rubber in the bottom of a chute. The lining application will be problematic and if erosion start in a spot because of the reasons listed above you are no better off.


1

Rubber liner failure diagnosis and probable causes. Part 1

Pipe -01_003

Figuring out just what went wrong after the fact is difficult but some of the circumstances of the failure can indicate the modes of failure.

Below I will list the problem and then identify what can go wrong in the lining procedure, manufacturing of rubber, improper match of material to process and mechanical failure that may have created this situation.


Delamination at the edge and or seam only: This occurrence can happen for a few different reasons.

Sharp Internal Edges :The most common reason is improper steel prep, meaning the welded flange had a sharp internal corner. Due to the rubber elasticity it’s difficult to properly adhere to an inside sharp corner.  During the cure the rubber may pull itself out of the corner depending on the rubber type. This results in a potential air pocket which can cause failures in the cure and is susceptible to erosion or edge separation depending on the compound.

Chlorobutyls and Bromobutyls and slurry chemicals: An interesting fact about rubber sheet with butyls is that on often rubber sheet manufacturers will us what is called a tie gum rubber to promote adhesion as a small layer. Depending on the application the tie gum which is a pure natural rubber may not be able to handle the high heat or the chemicals butyls are renown for. Separation at the seam is common if closed skives aren’t used or if the temperature exceeds the natural rubber threshold


Pipe-03_4CLateral

Edge delamination due to tie gum backing.


Sheet or sections fall off or are peeling off with little effort:

Improper Sandblast or dirty surfaceA blast profile of Nace standard SSPC SP5 is required with a profile of 2-3 1/2mils for raw rubber and a profile of 4 mils for pre-cured rubber . The reality is that the adhesive systems used in rubber lining are very aggressive and the blast profile can range and still be successful. None the less if you do not use proper girt to blast. Accidentally blasted with glass bead you can have failures.

Problematic adhesive: If you don’t stir the adhesive well, you will be applying more solvent than adhesive. If you  get dust on the adhesive you will prevent proper adhesion between coats or sheet. This will likely cause failures in the cure but if it makes out is prone to delamination in the field.


IMG00174-20120716-1123

Example of improper adhesive causing the sheet to delaminate.


Rubber edges growing like mushrooms, or failures near the edges:

UV and Ozone: UV and ground level ozone are rubbers enemy. Liners exposed for a period of time to the sun are prone to failure. Most rubber loose their elasticity and ability to combat erosion and corrosion. The outer edge is susceptible as it  most likely to be exposed to the sun. Although flange connections exposure have no performance effect as the inside of the rubber is not being exposed. Spools stored on the ground are likely to have exposure problems. Most rubber likes dark spaces and generally wont be affected by light in the short term like a few weeks. As a rule of thumb keep all rubber capped or cover.


IMG_1177

UV exposed rubber.

Pipe-02_003

Edge failure de to exposed rubber to UV.


Bubbles and dark spots in the rubber: 

Bubbles can form for various reasons. They will be discovered during the curing process. If not inspected and repaired before going into service will be a cause for concern long term. The rubber will be susceptible to tear and will wear as it will create turbulence.

Rubber calenderer with bubbles: This is very common as the rubber is layered up, air can be trapped between layers. The result is unsightly bubbles in the sub-straight. If the bubble are not very pronounced it will not affect performance. A visual inspection and a spark test can determine the severity of the bubbles.

Bad stitching and trapped gasses: If the rubber is improperly stitched or there is problem with the off gassing of the adhesive you will find out in the cure. Bubbles will be the result.

IMG00727-20130225-1346

An example of bubbles calendared into a sheet.

IMG-20131127-00375

An example of bad stitching, diluted adhesive or poorly applied adhesive, trapped gasses or dirt on the sub straight or liner.

IMG00551-20130108-1147

This is an example of rubber that has impurities in the compound which reacted to the cure.

IMG_0829

Example of sheet that has been calendared with trapped air. This is a bad liner and can cause turbulence, this would not pass a spark test and would perform poorly. This liner cannot be used!


Pre-Mature Erosion of the liner:

The factors which cause a liner to wear quickly  are vast. More often than not the velocities and particle sizes have exceeded the limits of rubber sheet. Chemicals not conducive to the rubber liner may be present and may have affected the liner such as pine oil a hydrocarbon which is not friendly to rubber.

100_0654

This piece eroded in less than a week. Velocities were extremely high and the particle size was 3/4″ minus. Very large. A better application would have been ceramics or chromium carbide.

 To be continued….